 Welcome to the second week of our
winter workshop series.
Properly managing appointments and schedules is essential for delivering exceptional patient care and achieving optimal efficiency in your busy dental practice. That’s why this week, we will explore Dentally calendars blocking and scheduling features to help you make the most of your appointment book.
Discover effective methods to optimise your calendar scheduling procedures in Dentally and simplify your administrative tasks.
Using Rotas
Rotas play a vital role in managing your practice. Having your diaries opened and blocked correctly enables you when delivering a top-quality patient booking experience. Whilst also ensuring practitioner availability across your practice team.
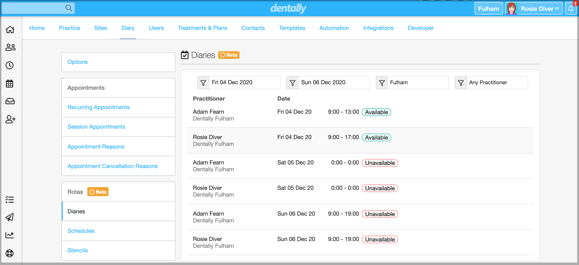
Dentally Rotas helps you stay organised by allowing you to set up available time that you can assign directly to each provider through a schedule.

What is a schedule? A schedule allows you to set a specific dentist's available time. Every provider has their own unique rota, which can be customised by layering schedules to create personalised opening hours.
Rotas allow for a flexible form of diary management ensuring that whether your staff are remote, on-site, or working across multiple practices, your schedules can be tailored to their needs and remain clear to understand across the entire business.
Blocking your Calendar
When you block your calendar, you are setting aside time during which your practitioners will NOT be available for work. For example, if someone calls in sick or takes a day off for annual leave, you will need to block out some ad-hoc days in your diary.
 By blocking time in your calendar, you ensure that your team's availability is accurately represented within Dentally. We understand that sometimes you may use your test patients to block out your calendar, but when blocking out your diary correctly, you can make certain everyone in the practice is aware of each other's availability whilst avoiding skewed FTA/DNA figures on your reports.
How to Block out your Calendar?
- Go to Settings > Diary > Schedules (under Rotas)
- Create a new schedule against the relevant practitioner and set the available time as needed.
- Once you are happy with the times, set the date range and click save.
- This will layer on top of the provider's existing rota and ensure only the set dates are blocked out in your diary.
By using this method, you are keeping your diary neat and tidy. Whilst making sure you are not associating that space with a patient, which can cause discrepancies in your reporting later down the line.

If you have any further questions on creating Rotas for your practitioner diaries, you can always reach out to Ellie and the support team via Live Chat in Dentally, who will be more than happy to help.
Stay tuned for week three of the series coming next Friday… Spoiler, we will be looking at the latest Dentally Portal features and how you can tailor your portal to suit your practice's needs!
 Australia
 United Kingdom
 Ireland
 New Zealand
 Canada