
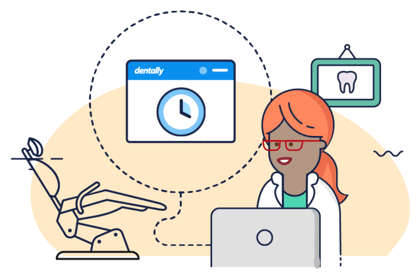
This week's focus is on the clinical side of your practice. We are going to look at how the software can support you in surgery from the very beginning. We discussed last week how as a reception user why it's important to ensure an efficient workflow. We touched on some of the customisations you have at your fingertips to improve your admin and ultimately change your patient's experience for the better.
This week we will run you through some of the key areas of what we call our ‘Clinical Competency Checklist’ This list covers the areas of Dentally where you spend most of your time. We will explore the fundamentals of each topic as well as provide some tips along the way that you can implement into your day to ensure a more productive and planned workflow.
Patients Arrival & Examination
Starting at the beginning seems like a great place to start. When a patient arrives for their appointment and the reception team has welcomed and marked them as here on the Dentally system, it will add them into the ‘waiting room.’ Our waiting room feature means you can always see how many patients are waiting to be seen, meaning you can plan ahead for your next appointments as you see them arrive.
Being able to open the patient's record from the waiting room list is also super handy. Meaning that you can have them up and ready before they come through to surgery, and even review any signed medical forms beforehand as well. This gives you more time to get to know your patients instead of being drowned in all the paperwork whilst they wait in the chair for you. Building up that much-needed trust is something you will have ample time for with these time-saving functions that we have developed for you.
When it comes to the patient's Examination you have two separate screens for either Perio or Chart. Both of which are designed with everything you need at your fingertips. One feature which is great for speed of use is the hover chart function on the chart screen.
With this enabled, you can simply hover the teeth on the desired surface, and it will bring up your most used items over the top of the tooth for you to chart from. It is also a smart function, meaning the more you use this the more it will learn your way of working, allowing for the suggested treatments to improve over time.
For more information on hover charting please head over to the help guide here
Treatment planning and clinical notes
 When it comes to efficiency charting your treatments is an area that we have focused on greatly. We know how consuming of your time the charting and note-taking process of an appointment can be. With that in mind, I have highlighted below some key features that Dentally has developed for you. We are always working on improving our application and just recently we have had an overhaul to our Perio tab which is noted below. Here are a few features that are often missed, that can help you master the clinical side of Dentally;
- The rename function, so you can easily identify each course of treatment for those that may be in the middle of various courses.
- The clone treatment plan button allows you to clone your last exam onto the patient to save you from copying and pasting each individually charted item.
- Treatment plan templates provides you with the ability to set up various pre-determined plans for treatments you carry out often. Can be a great time saver for those more complex treatments you do all the time!
- Our newly developed Perio feature (coming soon) will allow you easy access to compare exams and see any changes all on one screen.
- And of course, our clinical notes templates, which are often our biggest time saver. You can set up your notes in a way where you can simply update the important details for each individual patient, instead of starting from scratch every time!
Patients' departure and treatment history
The treatment history of the patient is always readily available for you via the History button on the right-hand side of the chart screen. I just wanted to highlight a couple of tips in relation to this.
- Firstly, if a patient ever requests to see a list of treatments they have had completed or a list of items they have planned this can be done from here by using the export to pdf button.
- Secondly, it can often be the case where something gets charted or charged accidentally to the patient. With Dentally you have the ability to remove a charged invoice so you can go back into the course and correct any mistakes made the first-time round.
You can find more information on removing charges in this help guide here

Lastly, I want to touch a little bit on the patient's departure and how refining your use of the available tools in Dentally, can help make departure easier for the next stage of the patient's journey. When the patient returns to reception to check themselves out, we want to make sure that when they are seen by reception, the team have all the information they need to finish off the patient's journey with ease, speed and a smile.
The dentist can be a nerve-wracking place for patients, so the arrival and departure are often the most important time to make a great impression. You can help make this checking out process smoother by following these simple tips to ensure a seamless workflow and patient experience;
- Charging the invoice through to the reception team in a timely manner means they can see easily the total amount that is owed by the patient without having to dig and waste time.
- When you complete a treatment plan it's always best practice to ensure you are updating the recall interval of the patient when prompted to.
- Any additional notes that need to be seen by reception should be sent ahead of time via our instant message feature, or if this is not needed until the next appointment you can set a patient-related task instead, ensuring you have this information readily available when they arrive or their next check-up.
So, there you have it, all the essential knowledge points you need to ensure the smoothest of workflows for the best patient experience possible. You can find all the information you need to delve further into the areas above on our help guides in the charting section here.